When using CAXA electronic drawing board, how to output JPG format files? Friends who are not familiar with it can quickly learn with the editor how to output JPG format files from CAXA electronic drawing board. I hope that this tutorial can help everyone.
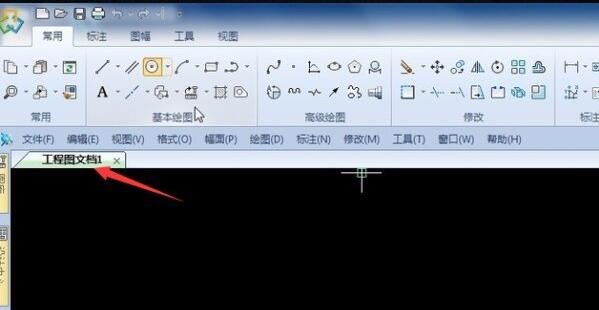
First, open the CAXA electronic drawing board on your computer. After opening it, open the project relationship diagram document in the editing area that needs to be exported as a JPG image.
In the empty black area, select Define Symbol and select the image.
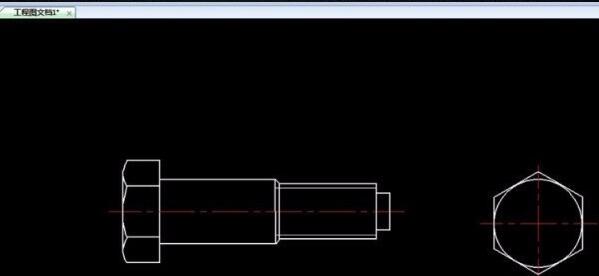
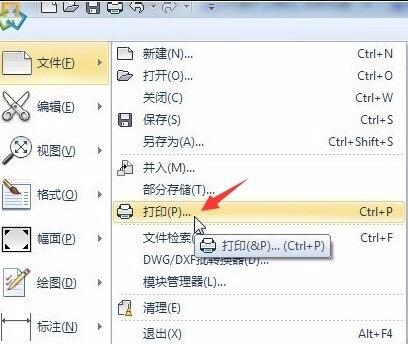
After drawing the graphic, select File>Print.
Then select the printer you want to convert the image to and select EXB to JPG.
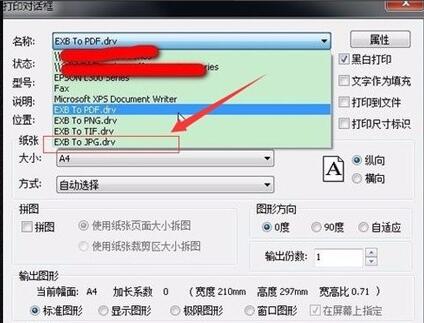
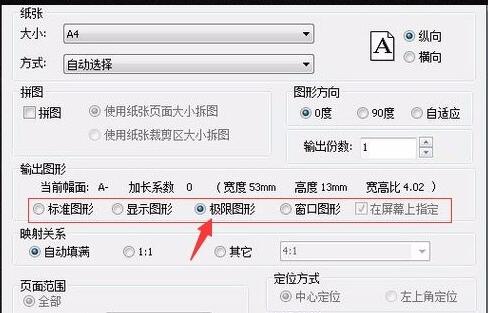
Then select the output graphic format as: Restricted Graphics, and click the Print button to export it to a JPG format file.

The above is the method shared by the editor to output JPG format files from the CAXA electronic drawing board. Friends in need can take a look.