Many friends are not familiar with the operation of iTools importing ppt to ipad. Below, the author will explain the operation process of iTools importing ppt to ipad. Let's take a look. I hope it will be helpful to you.
First open iTools. Connect the iPad to the computer with a data cable, and iTools will automatically associate with the iPad.
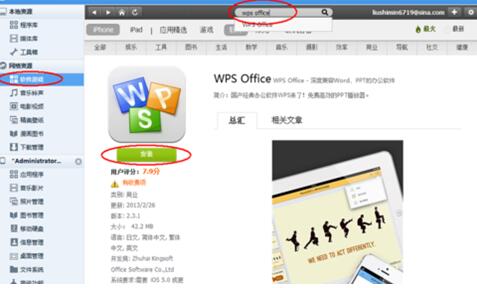
In the iTools interface, enter the network resources-software game menu, search for wps office and click the install button, and wait for itoos to automatically download and install this tool software. As shown in the picture:
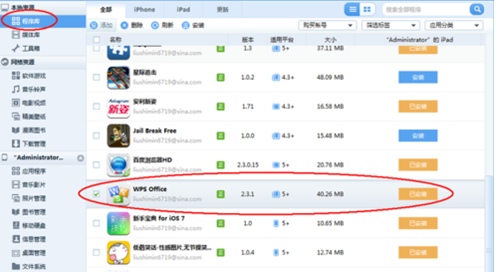
Go to Local Resources - Program Library to view installed software. If the installation package downloaded by itools is not installed automatically, you can also click the install button on the interface to install it manually. As shown in the picture:
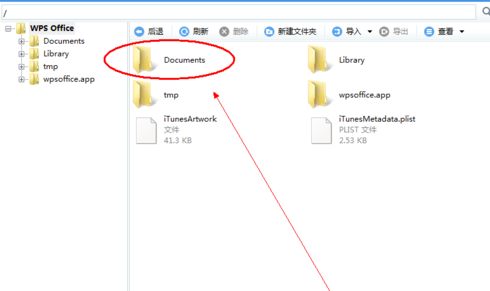
Go to My iPad - Applications to find the wps office you just installed, click Browse to enter the installation directory of wps office. As shown in the picture:

Click the folder Documents to enter the folder. The files viewed in wps office are all in this folder, so the imported files must also be placed in this folder before they can be viewed. As shown in the picture:
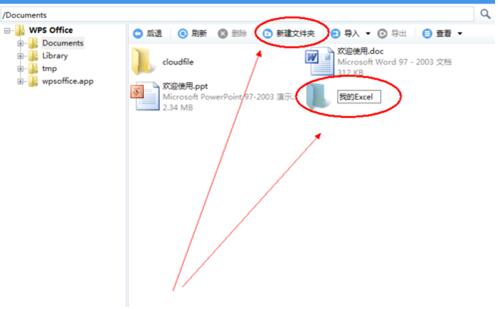
Create a new folder to store the imported office files. Click the New Folder button to create a new folder in the iPad and rename it. As shown in the picture:
In the newly created folder, click Import and select the office file you want to import on your computer. You can also directly import a folder on your computer and all files under the folder. As shown in the picture:

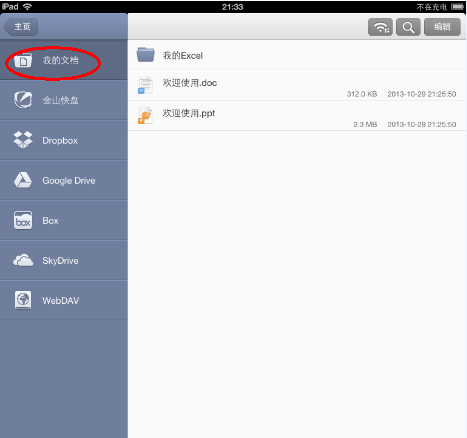
After the file is imported successfully, open the wps office software on the iPad. In the My Documents interface, pull down with your finger to refresh the file list. You can see the imported folders and files. You can open the file to view it. As shown in the picture:
Above, I have shared with you the detailed operation process of importing ppt to iPad via iTools. Friends in need should hurry up and read this article.


