Presumably some friends who have just come into contact with GoldWave still don’t know how to set up internal and external recording. So how does GoldWave specifically set up internal and external recording? Next, the editor will explain the steps for setting up internal and external recording in GoldWave. I believe it will definitely help you.
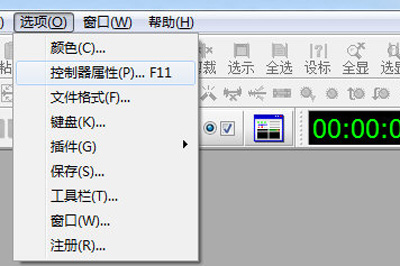
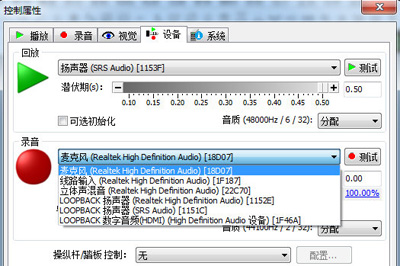
Open the software, click the software to enter the editing interface, click [Options] – [Controller Properties] on the menu bar, and use the shortcut key [F11] to enter the “Control Properties” dialog box. Click the "Devices" tab.

Select the speaker in the recording options to record. This switches to internal recording, which is free from external interference, audio signals are not lost, and the recording quality is good.

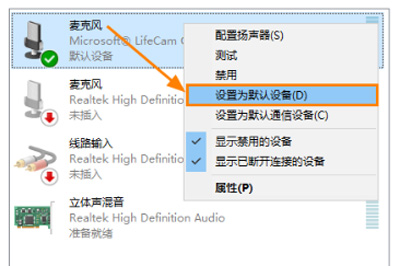
Select a microphone to record. Just switch to external microphone recording. After setting the source of the recorded sound, you can start recording. Using a microphone to record externally is prone to external interference and the sound signal is easily distorted, but its advantage is that it is convenient to record human voices and other sound signals. If the microphone cannot record, you need to enter the system's sound settings to set the input method.
Specific operation: Right-click the "Sound" icon at the bottom right of the main window interface, select the "Recording Device" option, select "Microphone", right-click and set to "Set as Default Device".

Come and learn the steps to set up internal and external recording with GoldWave. It will definitely help everyone.


