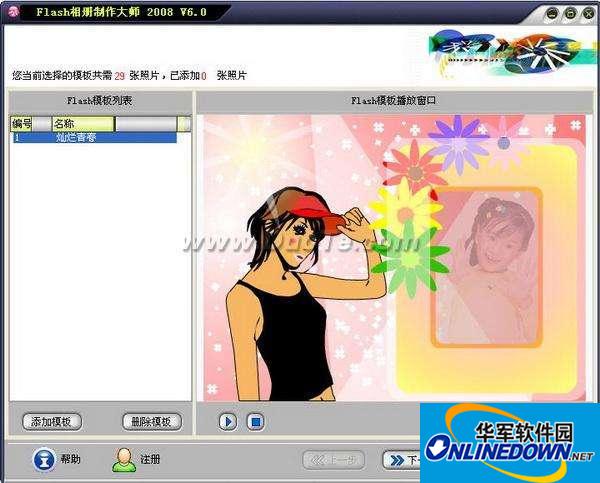
1. If you have installed the Flash photo album creation software, please double-click the shortcut icon on the desktop to open the interface as shown below.

Click the "Add Template" button, select the Flash template we provide you in the pop-up Open File dialog box, and click the "Open" button to add the template to the software. You can preview the effect of the template, select the template and click "Next".
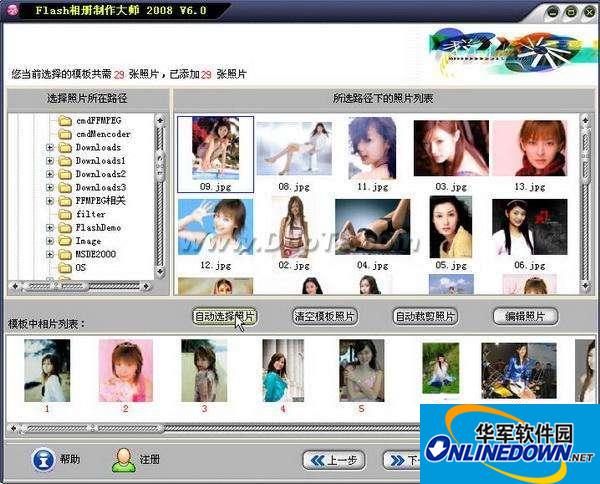
2. Next, you enter the window to add photos, as shown in the figure below:

After selecting the path where your photos are located, all photos will be displayed on the software. You can drag and drop the photos you want to the corresponding location in the "Photo List in Template" below, or you can click the "Automatically Select Photos" button, and the software will automatically select photos into the template. Next, you can click "Auto-crop photos" and the software will automatically crop all the photos, or you can manually crop and edit the photos one by one. After processing the photos, click the "Next" button to continue.
Operation tips: After adding photos, you can click "Auto-crop photos" first, then the software will crop all the photos added to the template. After automatic cropping, you can replace the photos you don't like after cropping based on the display of the cropped photos (select a photo and drag it to the location of the photo in the template to replace it), or double-click the photos you don't like after cropping to manually crop and edit. This way you can achieve the desired results quickly and well.
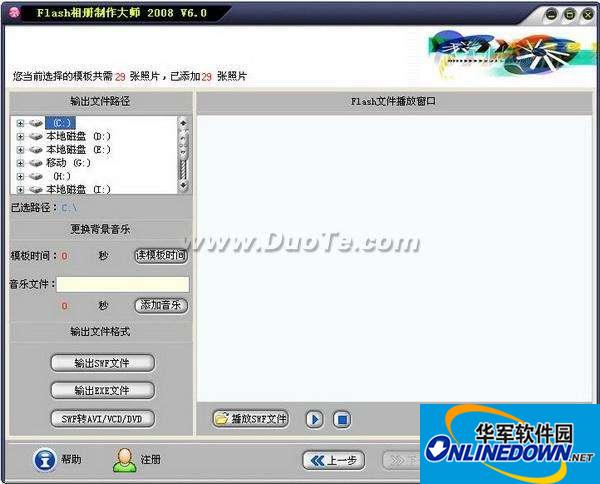
3. At this time we enter the Flash generation interface, as shown in the figure below:

First select the output path of the file, and click "Output SWF file" to generate a SWF file in Flash format. This kind of file requires a Flash player to play, and can also be uploaded to the Internet to share with friends. Click "Export EXE file" to generate a file that can be run directly on any computer and can be played without any player.


